
 07 3778 7155
 m2leadsmarketing@gmail.com
 Brisbane, Australia
Water has a quiet way of moving through a house until it suddenly isn’t quiet at all. In this article I’ll walk through how water behaves once it reaches walls and ceilings, what materials you’re actually watching give way, and what to do before small stains become structural failures. Expect practical signs to spot, sensible mitigation steps, and a few lessons I learned the hard way after a basement leak invaded a dining room wall.
what we mean by water damage and why it matters
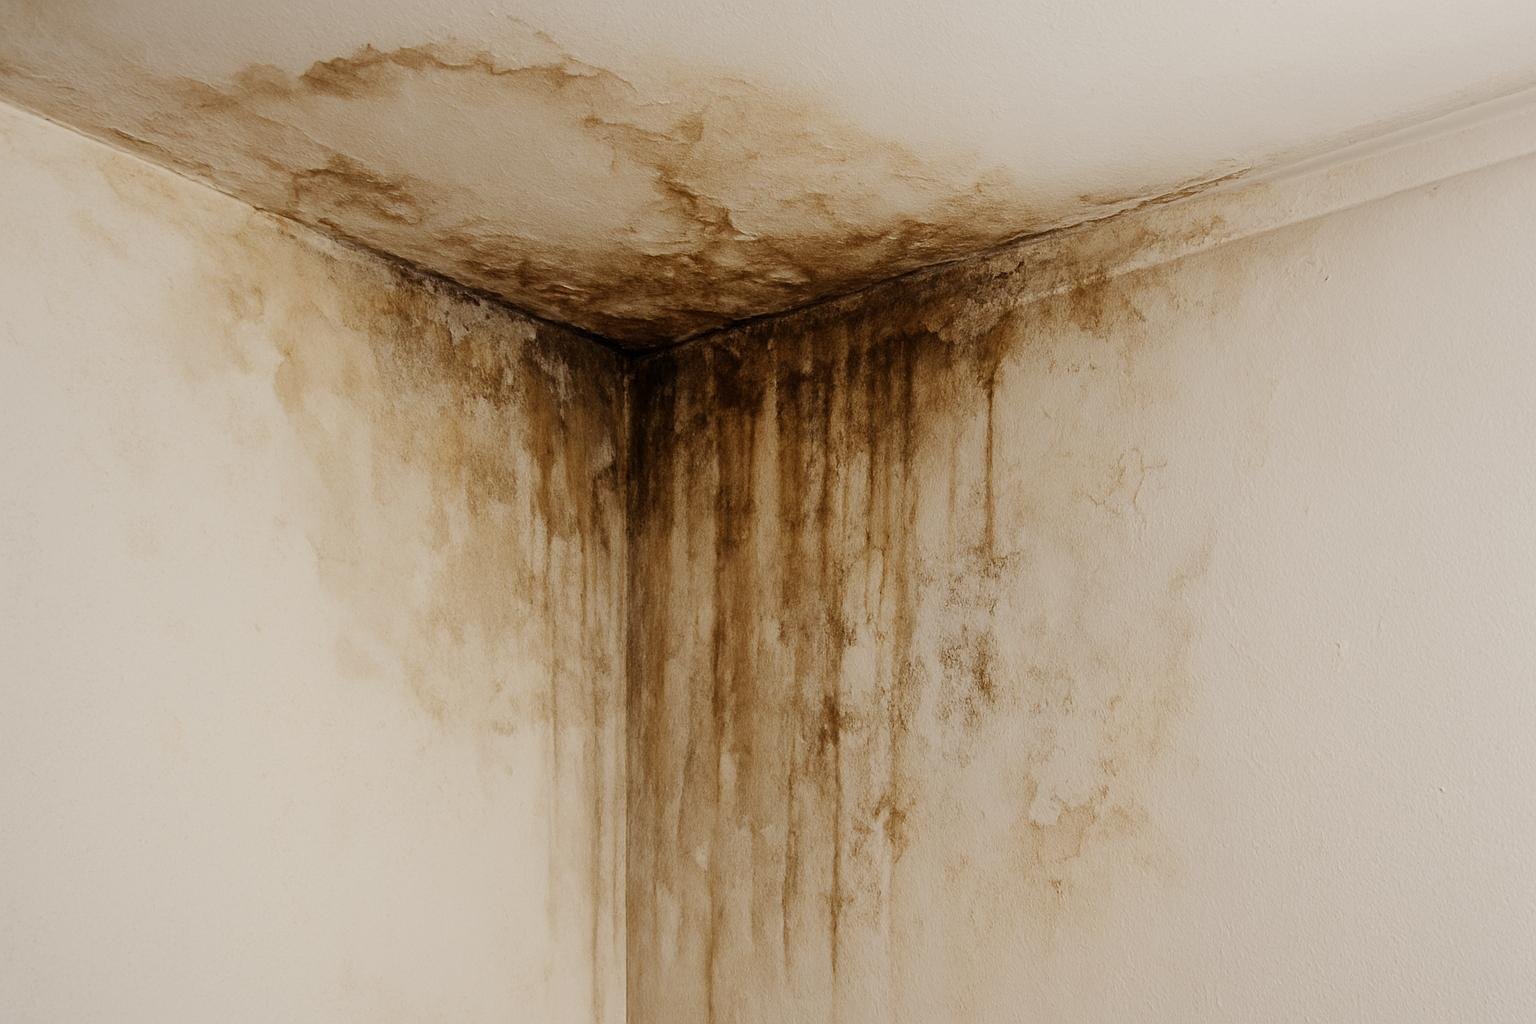
When people say water damage, they often picture a puddle or a water stain, but the reality is broader and slower. Water damage includes short, intense flood events and slow, hidden leaks; both eat away at materials, encourage biological growth, and undermine systems you don’t see until a repair bill arrives.
The reason walls and ceilings matter is simple: they’re structural and functional layers that protect insulation, wiring, and finishes. When those layers fail, you don’t just lose aesthetics — you can lose fire protection, thermal efficiency, and safe electrical systems.
Understanding how water travels, what it does to materials, and what a timely response looks like can save money and health headaches. Throughout this article I’ll mention How Water Damage in plain terms and show concrete examples so you can recognize it in your home or building.
common sources and types of water intrusion
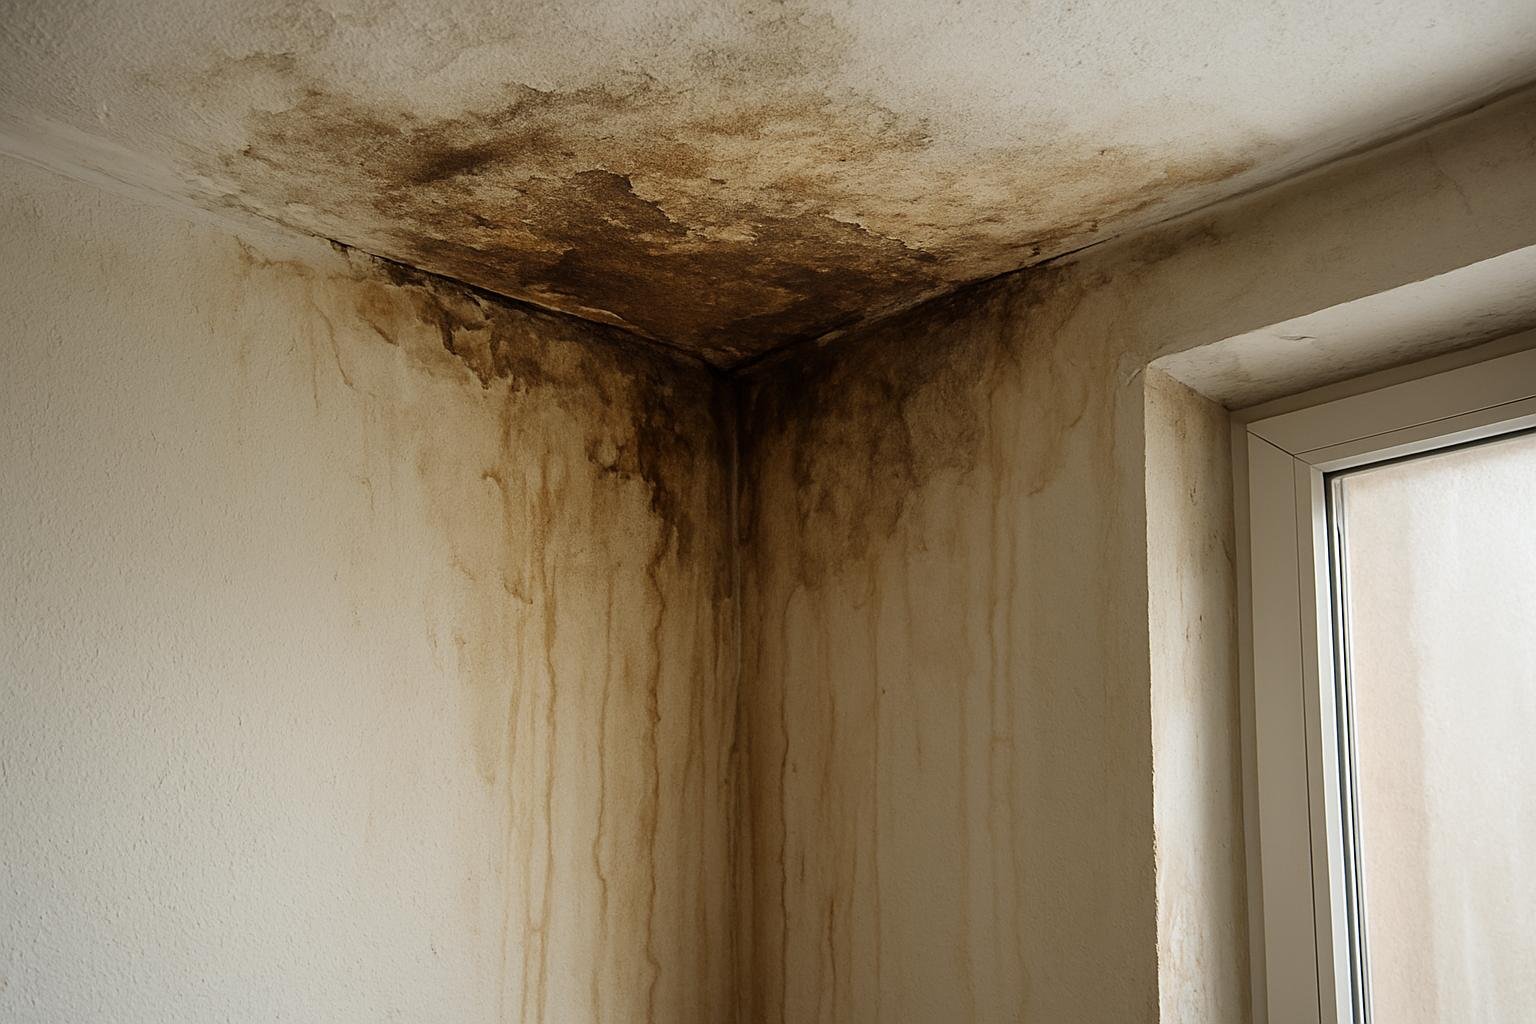
Not all water is equal. A burst supply line is high-volume and clean; roof leaks tend to be intermittent and can carry sediments; groundwater and sewage are contaminated and much more dangerous. Knowing the source helps decide whether you dry and disinfect or call specialists for hazardous remediation.
Roof leaks and plumbing failures are the most frequent causes of damage to ceilings and upper walls, while rising damp and failed drainage typically attack lower walls and basements. Condensation — often overlooked — can be a long-term culprit in exterior walls and above dropped ceilings.
Seasonal weather events, construction defects, and aging sealants also show up as slow-developing problems. I’ve seen homes with a seemingly solved roof leak return after one heavy winter because the flashing around a chimney was never properly resealed.
Each source leaves different traces: discoloration and soft drywall from steady leaks, peeling paint from condensation, and foul odors with sewage backup. Those clues guide the immediate response and the repair strategy you’ll eventually choose.
how water interacts with typical building materials
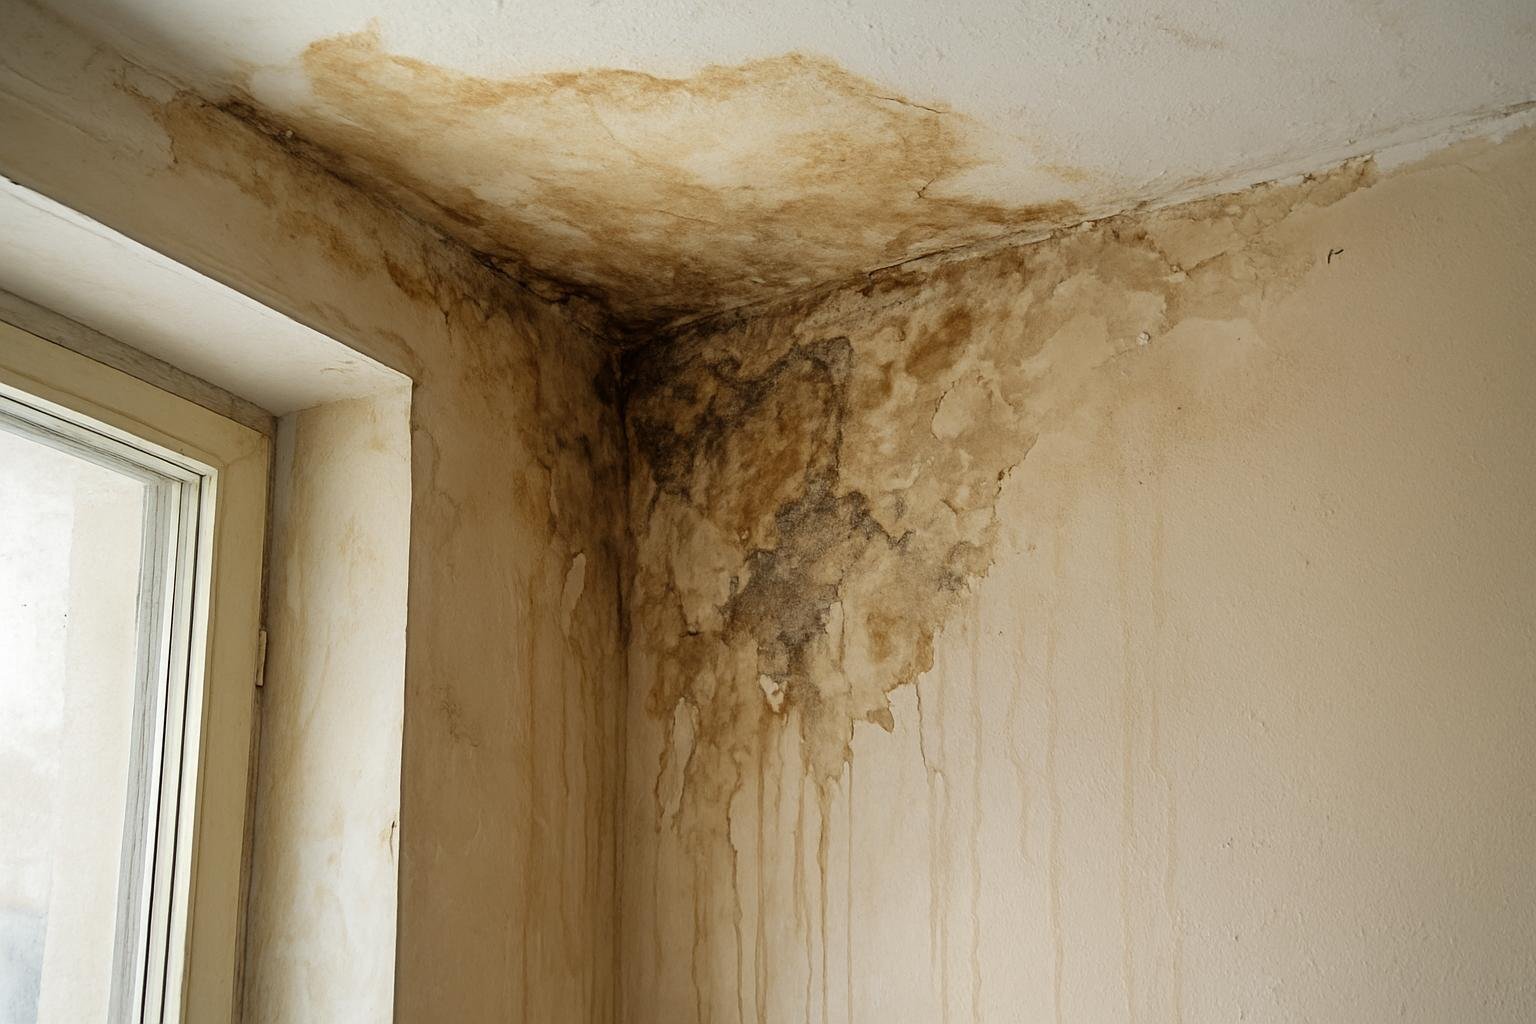
Water doesn’t have a single effect on a wall; it reacts according to the material, existing treatments, and how long it’s been present. Porous materials absorb, metal corrodes, and composites delaminate. The chemistry and physics of those interactions dictate how urgent a situation is.
Drywall, plaster, wood, insulation, fasteners, and finishes each have different thresholds for damage and different repair paths. For example, drywall softens and loses strength within hours to days, while wood framing may resist decay for a few weeks before rot and mold take root.
Vapor barriers, adhesives, and paints can slow water movement but also trap moisture, creating hidden wet pockets that dry slowly. That’s where monitoring moisture levels becomes as important as drying visible surfaces.
Below I break down specific materials and the usual progression of damage so you can assess severity and decide on patch, partial replace, or full rebuild.
drywall and plaster: swelling, sagging, and crumbling
Drywall reacts to moisture quickly. Paper-faced gypsum boards will discolor and lose stiffness within a short window; edges swell, joints separate, and long-exposed panels can delaminate and crumble. Small damp spots may seem cosmetic, but they often point to deeper saturation.
Plaster behaves differently: it’s denser and can mask moisture for longer before showing cracking or hairline fractures. Older lime-based plasters can absorb and release moisture without immediate collapse, but sustained dampness weakens the bond to lath and results in falling sections.
Either material that bulges or sags on a ceiling is an emergency signal — that ceiling could drop. In my own house a quick decision to puncture a sagging ceiling and relieve pooled water prevented a heavier collapse and limited the secondary damage to flooring and furniture.
wood framing, trim, and substructure
Wood’s response depends on exposure duration, species, and existing treatments. Short wetting is often reversible: wood dries, warps slightly, and holds fast. Long-term wetting, however, leads to fungal decay, softening, and eventual load-bearing compromise.
Termite and carpenter ant activity sometimes follows chronic moisture since damp wood attracts pests. Fasteners and nails corrode and lose holding power, which can lead to loose trim, bowed walls, and worse when those fastenings are structural.
Repair here ranges from sanding and treatment of surface rot to replacing studs and plates if decay has compromised structural capacity. An effective moisture survey will tell you where to replace rather than patch.
insulation, vapor barriers, and hidden cavities
Insulation absorbs moisture and loses R-value when wet. Fiberglass may retain water but dry slowly; cellulose insulation can clump and hold moisture longer, promoting mold. Closed-cell foam performs best in wet conditions but isn’t always present in older construction.
Vapor barriers that are installed incorrectly can trap moisture, creating pockets that persist for months. Those trapped wet zones are breeding grounds for mold and can be very difficult to dry without partial demolition to allow airflow.
Inspecting cavities behind walls and ceilings is often necessary. Small surface drying can leave significant residual moisture in insulation and sheathing, which will continue to cause problems unless addressed.
ceilings: unique vulnerabilities and finishes
Ceilings are particularly vulnerable because water accumulates along the horizontal plane and gravity works against the finish. Popcorn, textured, and acoustic tiles absorb water and are commonly ruined by leaks, while smooth painted ceilings may hide staining until paint delaminates.
Drop ceilings (suspended grids) often hide a wet space above where insulation and ducts collect moisture. Ceiling tiles can become limp and contaminate the room with particulate when they fail. The grid itself can corrode if water contains chemicals or is salty from coastal ingress.
Ceiling repairs frequently require replacing not just the visible layer but also addressing whatever sits above — ductwork, roof decking, or piping. Fixing the visible symptom without resolving the source invites repeat failures.
stages and timeline of deterioration
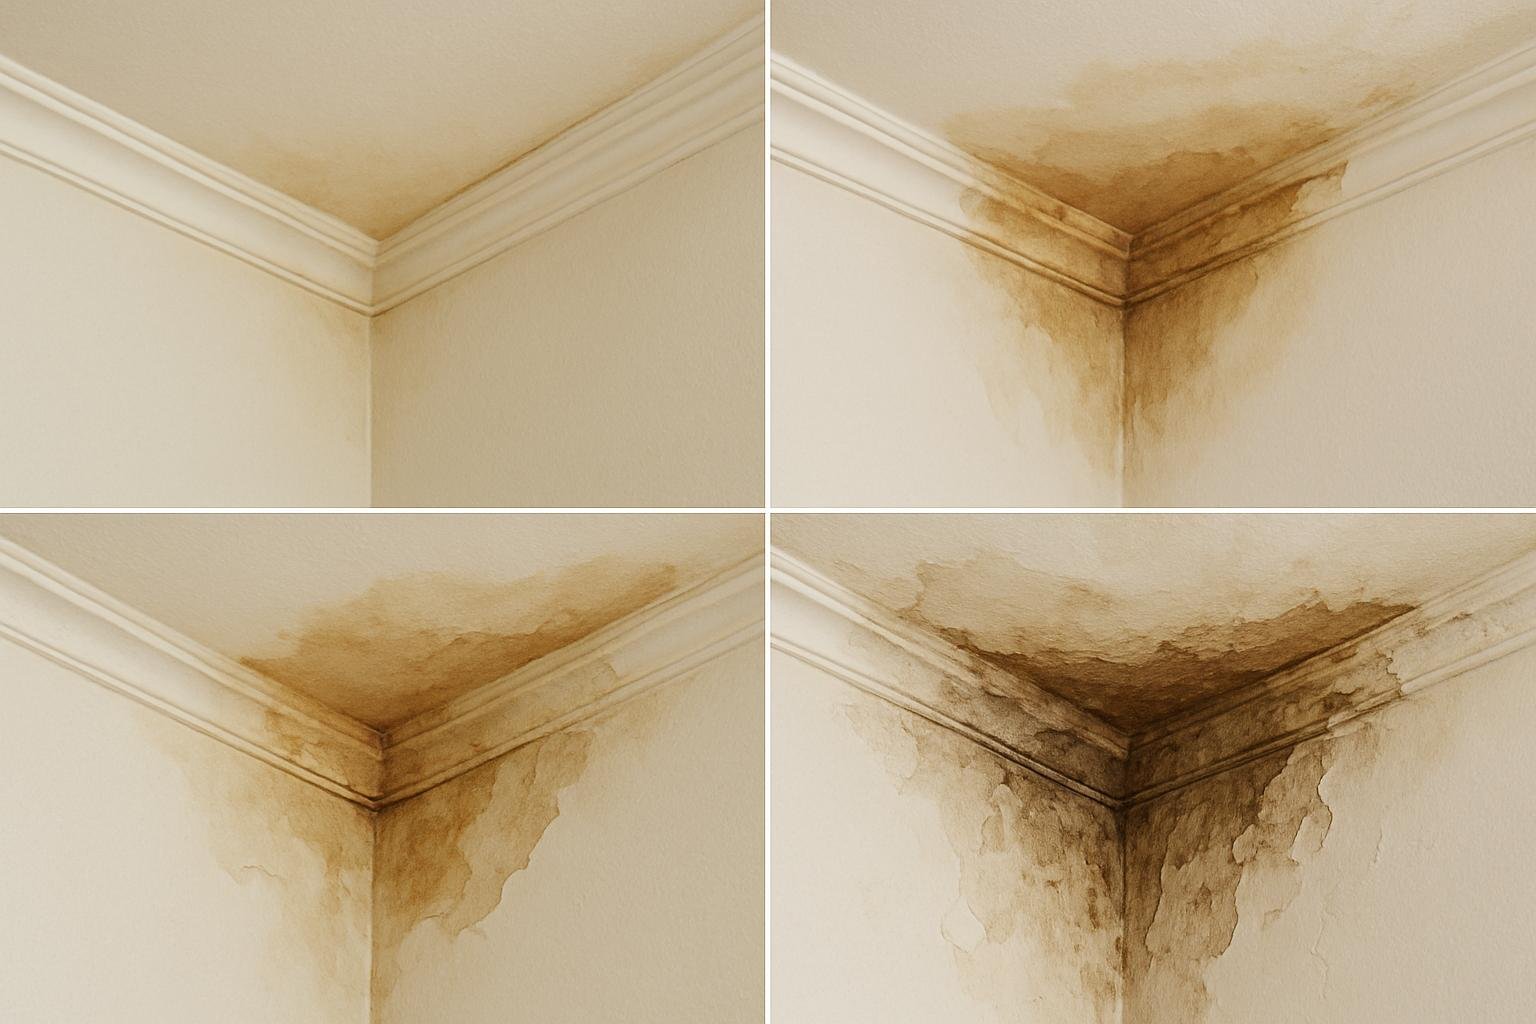
Water damage follows a recognizable timeline: immediate wetting, short-term destabilization, mid-term biological colonization, and long-term structural decay. Each stage presents different risks and requires different responses. Acting in the earliest stage reduces downstream work dramatically.
Within the first 24–48 hours, materials soften and finishes discolor. If the source is active, water pooling may occur and must be stopped immediately. That same period is often when temporary measures — buckets, tarps, and pumping — are most effective.
Between 48 hours and a week, mold spores begin to germinate on porous surfaces. Insulation and cellulose materials are particularly susceptible. During this window, rapid drying and targeted antimicrobial treatment can prevent entrenched mold colonies.
After a few weeks to months, decay sets in: wood loses strength, metal corrodes, and finishes delaminate. Repairs at this stage usually involve removal and replacement of affected assemblies rather than simple patching.
health risks: mold, bacteria, and indoor air quality
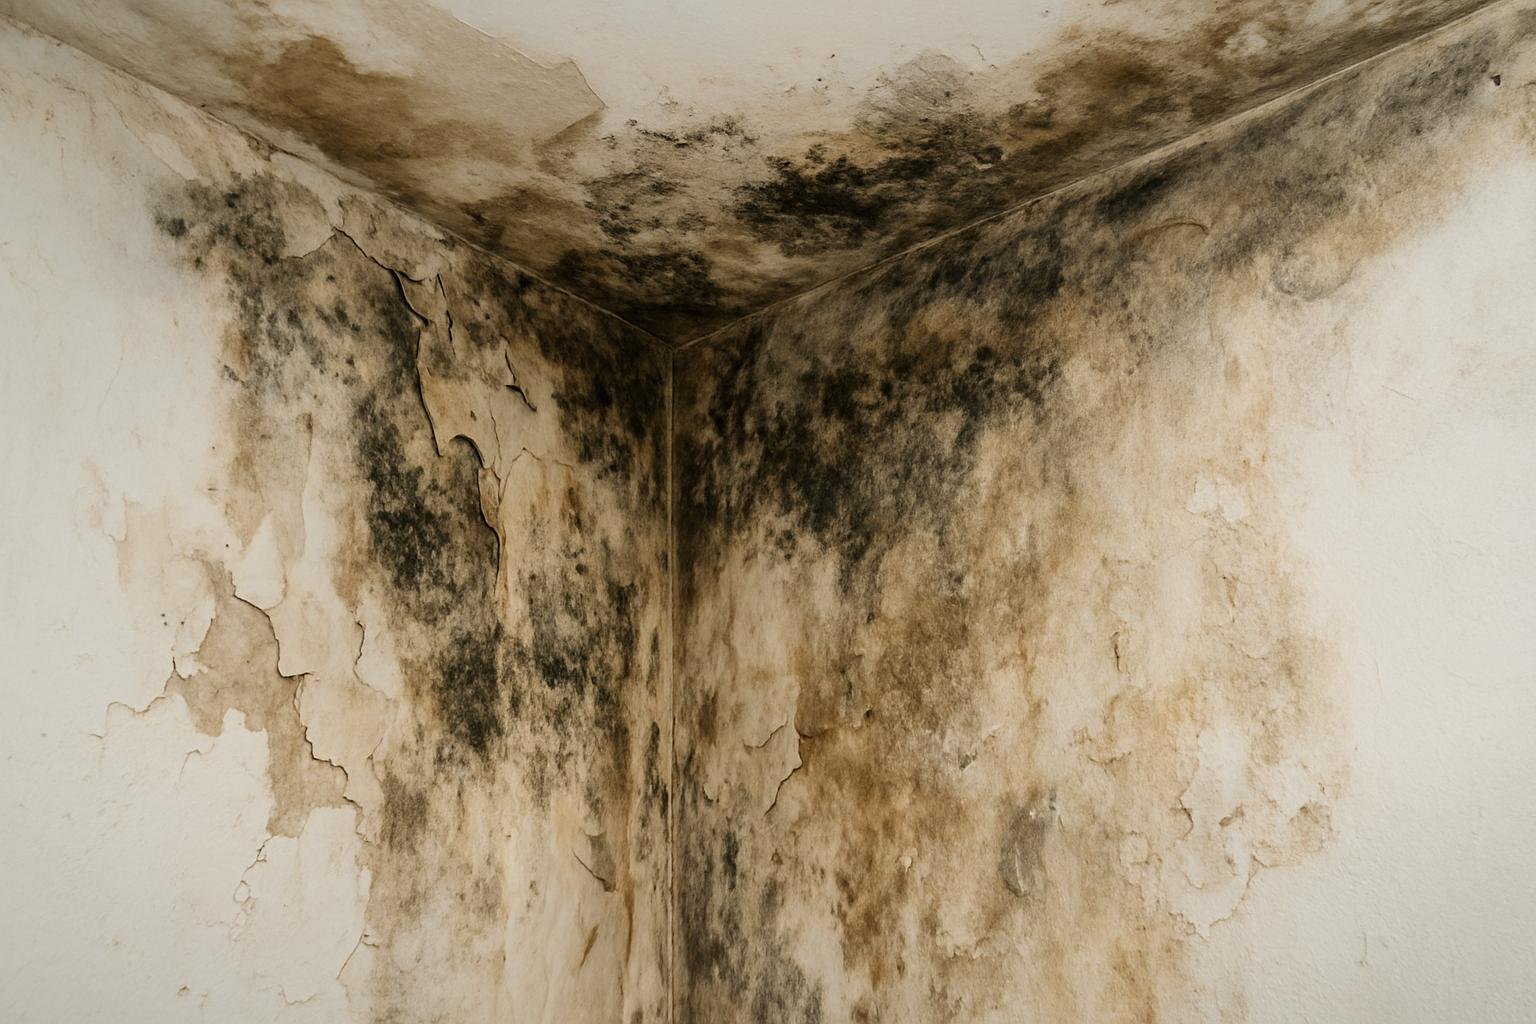
Mold is the headline health risk, but it’s not the only one. Bacterial growth, dust mite proliferation, and the off-gassing of degraded materials also harm indoor air quality. The specific risk depends on the water type — clean water is less hazardous than gray or black water.
Black water, which includes sewage or floodwater with biohazards, requires specialized handling and protective gear. Attempting to remediate contaminated water damage without professionals can expose you to pathogens and create liability for improper removal.
Allergic and respiratory reactions can arise from chronic exposure to damp environments even when mold colonies are not obvious. Sensitive individuals, children, and those with compromised immune systems are at greater risk and should avoid affected areas until remediation is complete.
Mold testing has a place, but visual inspection, moisture mapping, and history often provide the best immediate guidance. Long-term occupant health depends on both removing the source and drying or replacing contaminated components.
electrical and fire hazards
Water and electricity are a dangerous combination. Wet walls and ceilings can short circuits, corrode connections, and cause hidden wiring to behave unpredictably. Outlets and switches near damp areas should be considered at risk until inspected by an electrician.
Ceiling fixtures and recessed lighting channels are particularly vulnerable when roof leaks or plumbing above a ceiling are present. Water can travel along wiring paths and drip into junction boxes, creating shock or fire hazards long after the initial leak is repaired.
When in doubt, shut off power to affected zones and call a licensed electrician to evaluate any wiring that may have been exposed to moisture. That single precaution can prevent both immediate injury and insidious corrosion that leads to later failures.
detecting water damage early: visual and non-visual signs
Visible stains, peeling paint, and soft spots are obvious signs to look for, but non-visual clues often arrive earlier. Musty odors, higher-than-normal humidity in a room, or unexplained increases in heating or cooling bills can point to hidden moisture problems.
Tools make a difference. Moisture meters, infrared cameras, and borescopes let you detect wet zones that visual inspection misses. An infrared scan can reveal cold spots where moisture has lowered thermal resistance long before discoloration appears.
Regular checks after storms, around plumbing fixtures, and in attics and crawlspaces catch leaks early. Make a habit of scanning ceilings for small pinhole stains and testing behind large furniture near exterior walls — those are common hidden leak locations.
Here’s a short checklist you can use during a quick home inspection:
- Look for discoloration, bubbling paint, or warped trim.
- Smell for mustiness in closets and basements.
- Check for higher-than-normal indoor humidity and condensation on windows.
- Inspect attic and roof penetrations after heavy rain.
immediate steps after discovering water intrusion
Stop the source if you can safely do so: shut off the main water valve for plumbing leaks or use tarps and temporary patches for roof leaks until a professional repair is scheduled. Stopping inflow is the single most important early action.
Protect belongings by moving furniture and electronics away from wet walls and off wet floors. Remove wet textiles like rugs and soft furnishings to a dry area; fabrics are quick to harbor mold and require either professional cleaning or disposal.
Document the damage thoroughly with photos and notes for your records and insurance claims. Date-stamped images taken before cleanup help substantiate both cause and extent when dealing with adjusters.
If the water is contaminated, such as sewage backup, evacuate the area and call a remediation professional. Do not attempt to clean hazardous water yourself without proper equipment and training.
drying and mitigation: methods and equipment
Drying is both an art and a science. You need airflow, heat, and dehumidification in the right balance to remove moisture without driving contaminants deeper into materials. The choice of equipment depends on room size, material types, and the extent of saturation.
Air movers and axial fans promote evaporation, while dehumidifiers capture the moisture once it’s airborne. In some cases, heaters accelerate drying but must be used carefully to avoid over-drying brittle materials. Monitoring moisture levels guides when to stop.
Sometimes physical removal is the fastest path to a healthy result: cutting out saturated drywall or replacing insulation reduces drying time and eliminates mold-prone material. Other times, structural materials can be dried in place with targeted drying systems.
Professional restoration companies use moisture meters, hygrometers, and industrial drying rigs. If you choose a DIY approach, rent appropriate equipment and monitor regularly; under- or over-drying both create problems.
drying and repair options at a glance
| Material | Typical sign | Usual response |
|---|---|---|
| Drywall | Staining, soft edges, sagging | Cut-out, replace, tape/finish |
| Plaster | Cracks, hollow sounds, chunks falling | Local repair or replaster, possible re-lath |
| Wood framing | Soft spots, rot, mold | Dry and treat for minor; replace for decay |
| Insulation | Wet, clumping, loss of loft | Remove and replace |
| Ceiling tiles | Collapse, staining, sagging | Replace tiles and address above-ceiling issues |
repair strategies: patching, replacing, or rebuilding
Choosing between patching and replacing requires evaluating the extent of saturation and the likelihood of future moisture. A cosmetic patch on a repeatedly damp area is a false economy; proper repair addresses the root cause first.
Minor damage such as small drywall stains can often be dried and repainted if no mold or structural compromise exists. Medium damage usually means removing affected boards, drying framing, and replacing insulation and finishes.
Large or repeated failures, or those involving contaminated water, often call for rebuilding assemblies and possibly upgrading materials to more water-resistant options. That’s the time to consider materials like cement board, closed-cell foam, or water-resistant gypsum in vulnerable areas.
Always document repairs and the steps taken to dry and disinfect — future owners or inspectors will want that history, and it can be crucial for insurance documentation.
when to call a professional
Call professionals when water exposure is extensive, when sewage or contaminated water is involved, or when structural elements or electrical systems are affected. Certified restorers have equipment and protocols to safely remove hazards and prevent secondary damage.
If the damage involves mold over a large area — generally defined by industry standards as more than ten square feet — remediation companies should handle removal and containment. They will also establish clearance criteria for safe reoccupation after work is done.
Find contractors who can provide references, proof of insurance, and clear scopes of work. A restoration specialist should offer moisture mapping, a drying plan, and a verification report showing that materials have returned to acceptable moisture levels.
evaluating costs and insurance considerations
Costs vary widely depending on the water category (clean, gray, black), affected area, and whether structural repairs are needed. A small drywall replacement is inexpensive; rebuilding load-bearing walls and associated finishes is not. Expect remediation to run from hundreds to tens of thousands of dollars in extreme cases.
Insurance coverage depends on the policy and the cause. Sudden events like burst pipes are often covered under standard homeowners policies, while gradual issues tied to lack of maintenance — such as long-term seepage — may be excluded. Flood insurance is separate and required for floodplain properties.
Keep detailed documentation of the event, repairs, and any professional reports to support claims. A clear timeline showing when you discovered the leak, mitigated damage, and reported it to the carrier helps avoid disputes over covered losses.
When negotiating repairs, get multiple bids and verify that contractors include moisture verification and warranty for the work done. A cheap fix without proper drying will cost more in the long term.
preventive design and maintenance to reduce risk
Prevention is the cheapest long-term strategy. Maintain roof flashings, clean gutters, check sealants around windows and doors, and inspect attic and crawlspace ventilation periodically. Those small, routine actions often prevent the big, expensive failures.
Consider upgrades where practical: backflow preventers on sewer lines, higher-quality flashing around roof penetrations, and water detection devices near high-risk appliances like water heaters and washing machines. Automatic shutoff systems can be lifesavers in high-value properties.
In new construction or major renovations, choose water-resilient materials in susceptible areas — cement board for bathroom walls, closed-cell foam insulation in exterior cavities, and metal studs where rot risk is high. Design with access panels to allow inspection and maintenance of critical junctions.
Finally, keep an eye on landscaping and grading; soil that directs water toward the foundation is a silent enemy. Proper grading and good drainage systems are basic, effective defenses against rising damp and basement floods.
case studies and personal experience
A few years ago I dealt with a slow leak behind a dining room wall that turned out to be a pinhole in a copper branch line. At first it was a faint stain and nothing more, but over eight months the drywall softened and mold developed in the cavity. The delayed response turned a simple plumbing repair into a full wall replacement and mold remediation job.
That experience taught me to trust small, persistent signs and to act quickly. I documented everything, worked with a licensed plumber to definitively fix the source, and hired a restorer to remove compromised materials and verify dryness. The total expense was far higher than the cost of the original repair would have been.
I’ve also seen the opposite: a prompt roof tarp and professional drying after a storm saved a homeowner thousands by preventing ceiling collapse and extensive mold. Both examples drive home the same point — timing matters as much as method.
When neighbors experienced a sewer backup in a low-lying subdivision, we pooled resources to learn from their mistakes and added backflow valves and higher-grade sump systems to neighboring homes. Prevention at a community scale can be surprisingly effective and cost-efficient.
monitoring and long-term follow-up after repairs
After repairs, don’t assume all is well; monitor the area for recurring dampness, new stains, or musty smells for at least several seasons. Seasonal changes and heavy storms are good stress tests for any repair done near roofs, gutters, or exterior walls.
Use disposable hygrometers or smart sensors to track humidity in vulnerable spaces like basements and attics. Many devices log data you can use to catch rising trends before visible damage returns.
Keep repair records, warranty documents, and vendor contacts handy. If another issue appears, having that history speeds diagnosis and helps professionals recommend targeted fixes rather than starting over with broad demolition.
practical checklist: what to do immediately and what to plan for
When you first discover water intrusion, prioritize safety and source control. Turn off electricity in affected areas if water is near outlets, shut off the main water if a plumbing break is involved, and remove possessions from threatened zones.
Next, document the scene with photographs and notes, then engage either an insured restoration specialist for large or contaminated events or rent drying equipment and proceed carefully for small clean water incidents. Keep receipts and records to support insurance claims.
Plan for follow-up actions: moisture verification, replacement of damaged materials, and monitoring. Schedule inspections for electrical and structural systems if water reached those components to prevent hidden failures later on.
tools and products worth knowing about
Moisture meters, infrared cameras, industrial fans, and desiccant or refrigerant dehumidifiers are the backbone of effective drying. For small projects, a reliable moisture meter and a few high-velocity fans can make a big difference when used correctly.
Antimicrobial treatments are helpful when mold risk is present, but they are not replacements for removal of saturated, porous materials. Biocides and encapsulants have uses in controlled applications, particularly on non-porous surfaces.
Water sensors and automatic shutoff valves are excellent investments for high-risk areas. They provide early alerts and automatic mitigation that prevent hours of unnoticed leaking from becoming days or weeks of damage.
repair materials and techniques that resist future problems
When rebuilding, choose materials suited to the expected exposure. Cement board and water-resistant gypsum help in bathrooms; closed-cell spray foam reduces moisture penetration and improves insulation where appropriate. Stainless fasteners and corrosion-resistant metals extend service life in damp spaces.
Use breathable assemblies where possible to avoid trapping moisture. Modern building science favors controlled drying paths — allow assemblies to dry to the direction with the least resistance rather than sealing moisture inside with impermeable finishes.
Seams, penetrations, and transitions are the usual weak spots. Pay special attention to flashing, sealants, and proper installation of vapor retarders to avoid creating new problems while fixing old ones.
common repair myths to avoid
Patching a stained ceiling and repainting often looks cheap and effective, but without drying and mold inspection you may be hiding an ongoing problem. Cosmetic fixes rarely cure underlying moisture issues and can mask conditions that will reappear.
Another myth is that any drying is good drying. Overheating a wet assembly with no dehumidification can drive moisture deeper or cause finishes to crack. Effective drying balances airflow, temperature, and humidity control.
Finally, some homeowners assume that if insurance pays they can accept any contractor. Insurance approval does not replace due diligence; verify credentials, get multiple estimates, and ensure proper final verification of dryness and cleanliness.
final thoughts and practical next steps
Understanding How Water Damage affects the hidden parts of your home changes the way you inspect, maintain, and respond to problems. Quick action, correct diagnosis, and appropriate repair save money and protect your health more reliably than last-minute cosmetic fixes.
Create a simple home inspection routine: check for stains and odors monthly in vulnerable locations, maintain gutters and downspouts seasonally, and install a few water sensors near appliances. Those small habits make an outsized difference over time.
If you face an active leak, stop the source, document the damage, and prioritize drying and safety. For larger, contaminated, or structural situations, involve licensed professionals to ensure the work is done thoroughly and safely.
Above all, treat moisture as a serious issue rather than a cosmetic nuisance. With the right knowledge and timely action you can prevent small damp spots from turning into major repairs and preserve both the comfort and value of your home.

